SSO Guide · Microsoft Entra ID
A guide for Tuple customers who want to use SAML SSO with Microsoft Entra ID (formerly Azure AD) as the Identity Provider.
Step 1 - Create Enterprise Application
Sign in to the Microsoft Entra admin center as at least a Cloud Application Administrator.
Navigate to Identity > Applications > Enterprise applications and click New application. Then click Create your own application.
Enter “Tuple” as the application name, select Integrate any other application you don’t find in the gallery (Non-gallery), and click Create.
Step 2 - Assign Users
Before configuring SSO, assign the users who need access to Tuple. In your new Tuple application, go to Users and groups and add the users or groups that should have SSO access.
Step 3 - Configure SAML
In your Tuple application, navigate to Single sign-on in the left sidebar and select SAML as the sign-on method.
Click Edit on the Basic SAML Configuration card and fill in the following fields:
Identifier (Entity ID)
https://production.tuple.app/users/saml/metadataReply URL (Assertion Consumer Service URL)
https://production.tuple.app/users/saml/authClick Save.
Step 4 - Configure Attributes & Claims
Click Edit on the Attributes & Claims card. You need to add two custom claims so that Tuple receives the user’s first and last name.
Click Add new claim and create each of the following:
| Name | Source attribute |
|---|---|
first_name | user.givenname |
last_name | user.surname |
Leave the Namespace field empty for both claims.
Tuple also reads email from the SAML response. The default claim for email address mapped to user.mail will work automatically — no changes needed.
Step 5 - Setup SAML in Tuple
On the SAML Certificates card, download the Certificate (Base64) file.
Then, in the Set up Tuple card, copy the following values:
- Login URL — this is your IdP authentication URL
- Microsoft Entra Identifier — this is your IdP entity ID
Navigate to the Settings tab of the team management dashboard. Note: Only Team Owners have access to this page, so you will need to be Team Owner to access this page. If you need to find out who the Team Owner for your team is, view your profile.
Toggle to Enable SAML, and the configuration form will be revealed:
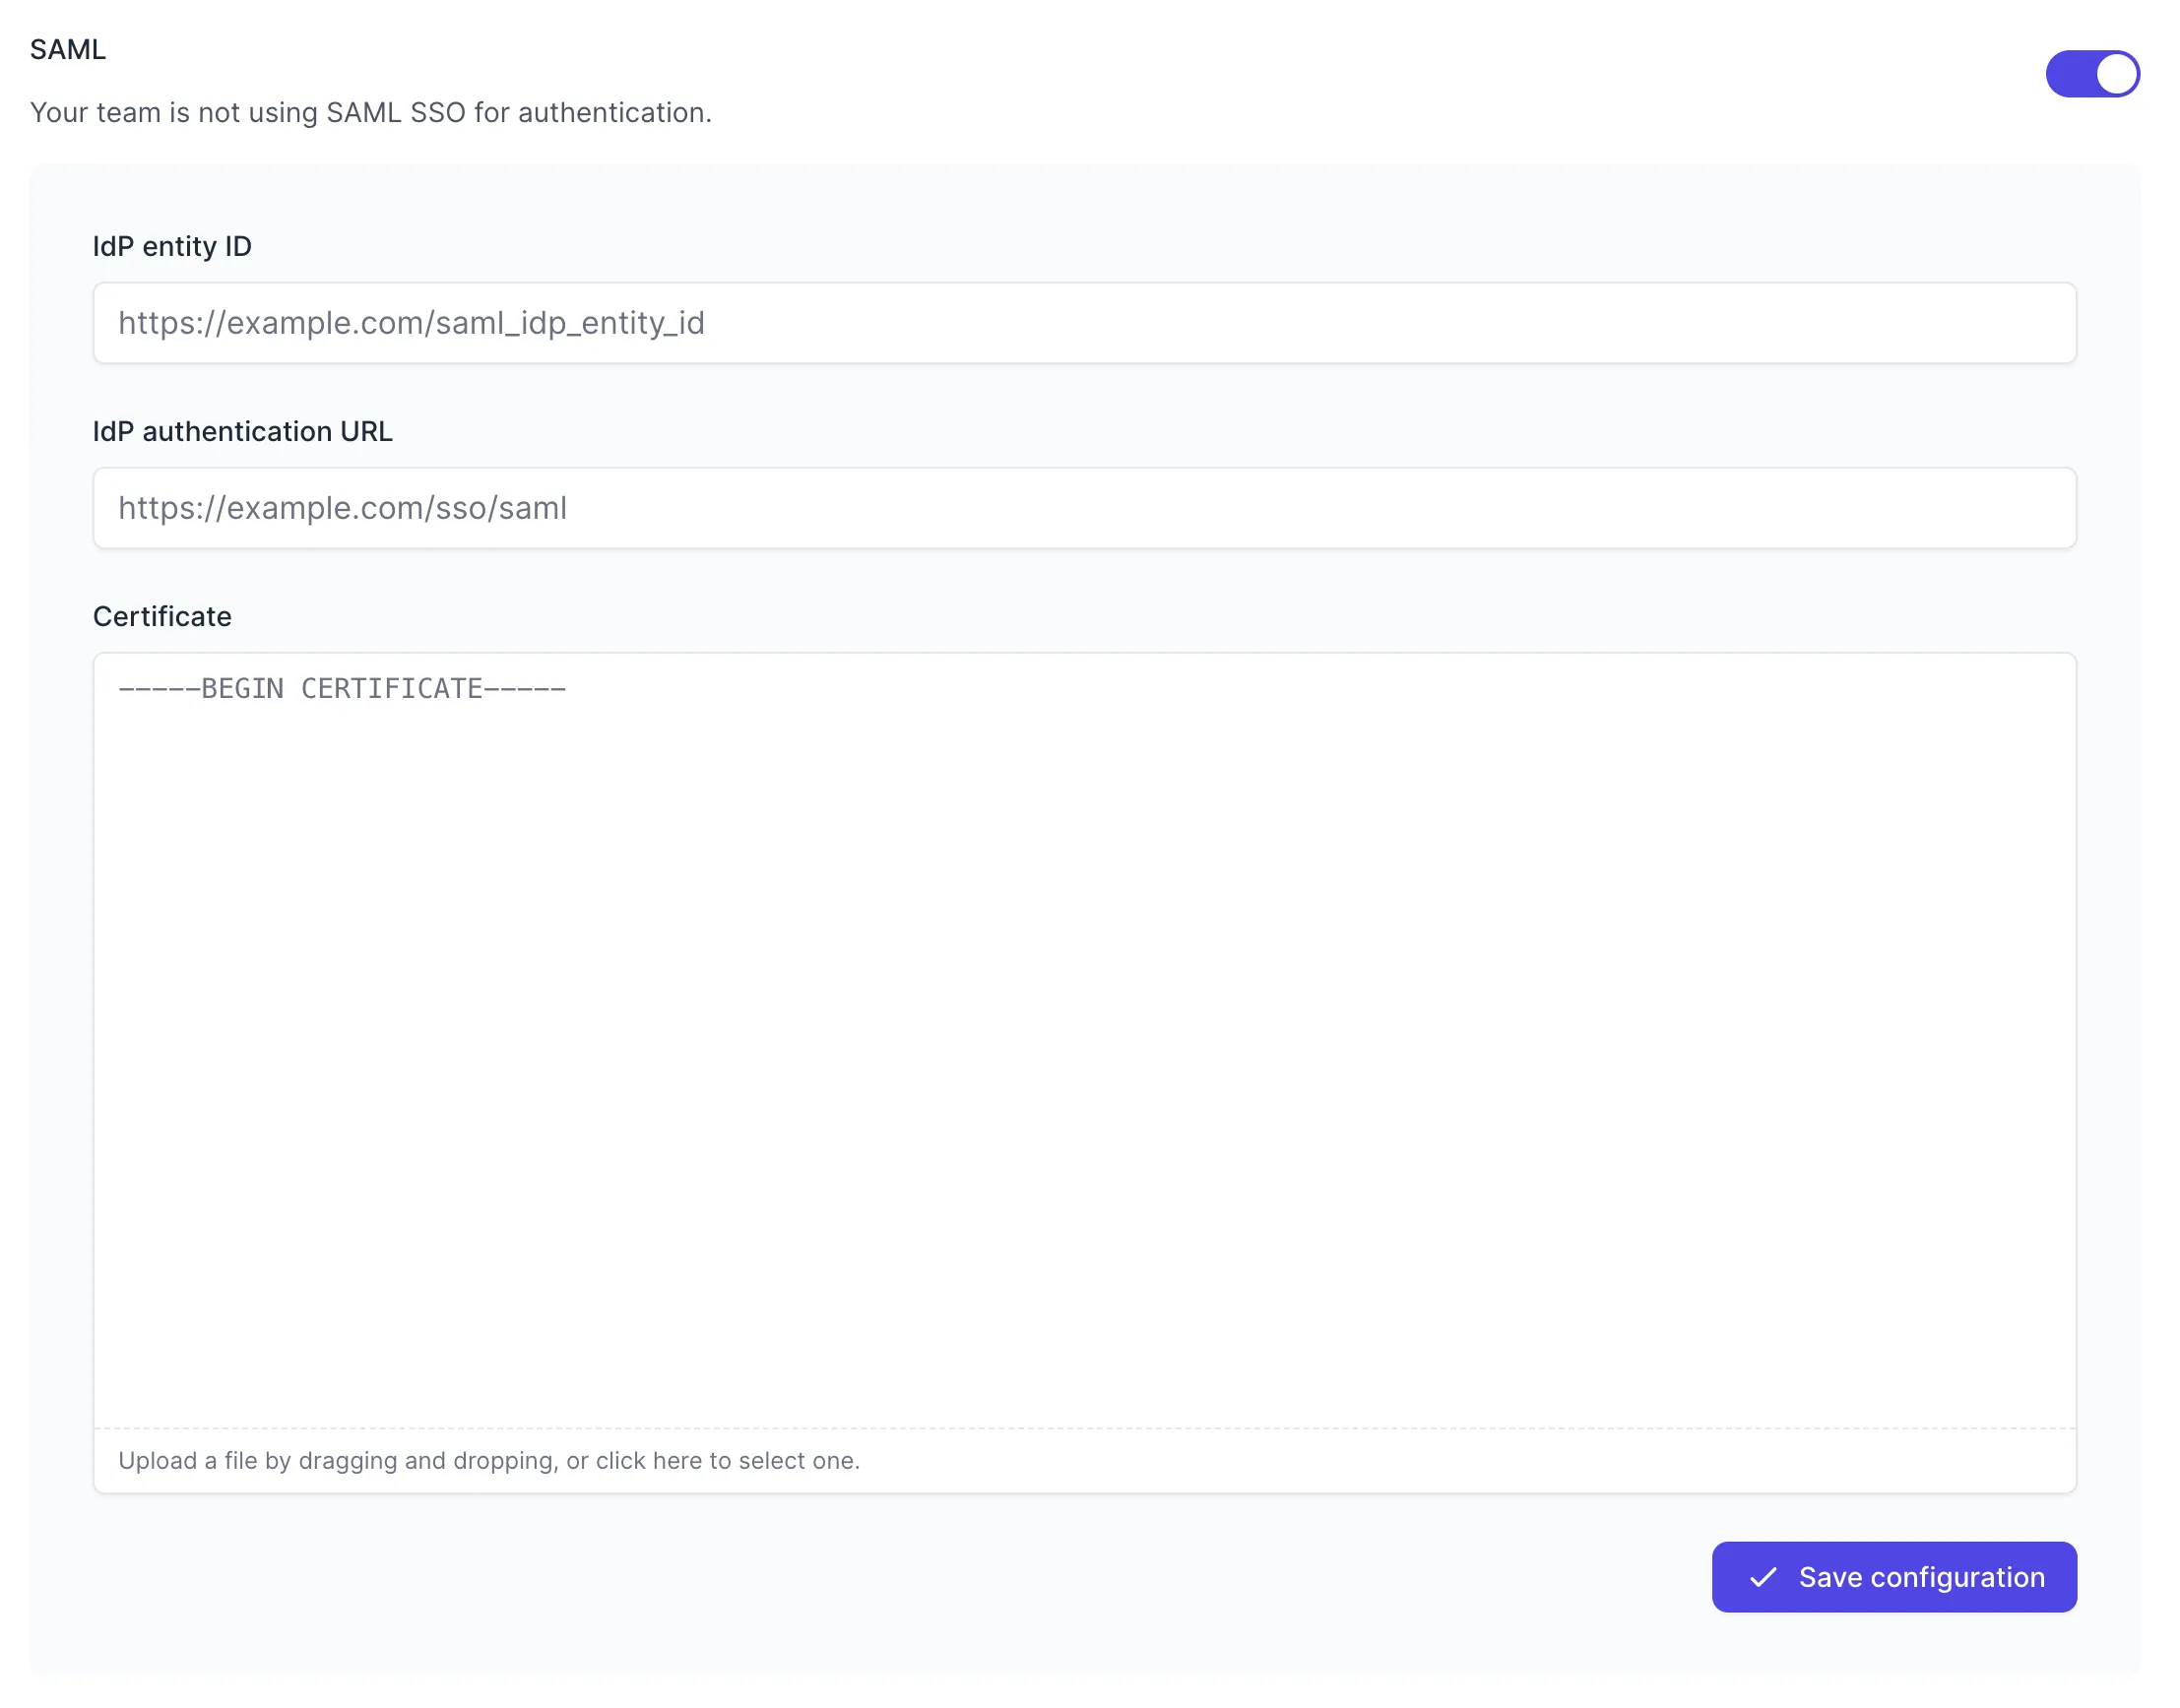
Fill in the values with your metadata:
- IdP entity ID — your Microsoft Entra Identifier
- IdP authentication URL — your Login URL
- Certificate — the downloaded Base64 certificate file
Press “Save Configuration” to turn on SAML for your team. Once SAML is enabled, any active Tuple sessions will persist, but any new logins will be forced to authenticate using Microsoft Entra ID. Log in here to verify that it’s working.