SSO Guide · Google
A guide for Tuple customers who want to use SAML SSO with Google Workspace as the Identity Provider.
Step 1 - Add custom SAML app
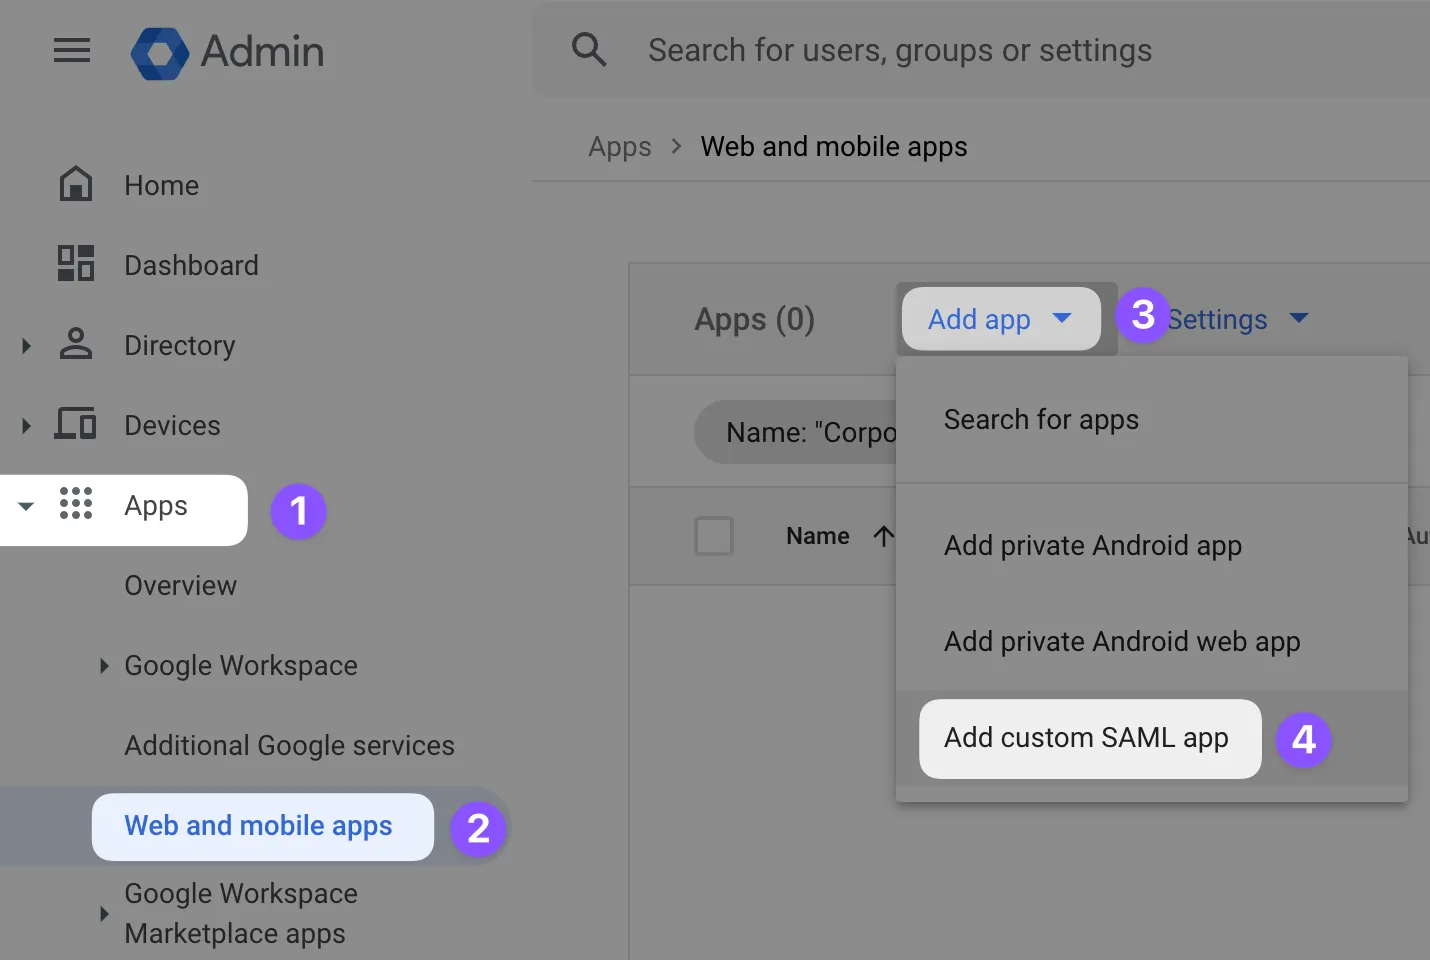
After signing in to your Google Workspace Admin console, you’ll need to add a new custom SAML app. Click on “Apps -> Web and mobile apps -> Add app -> Add custom SAML app” as shown below:
Step 2 - Create App
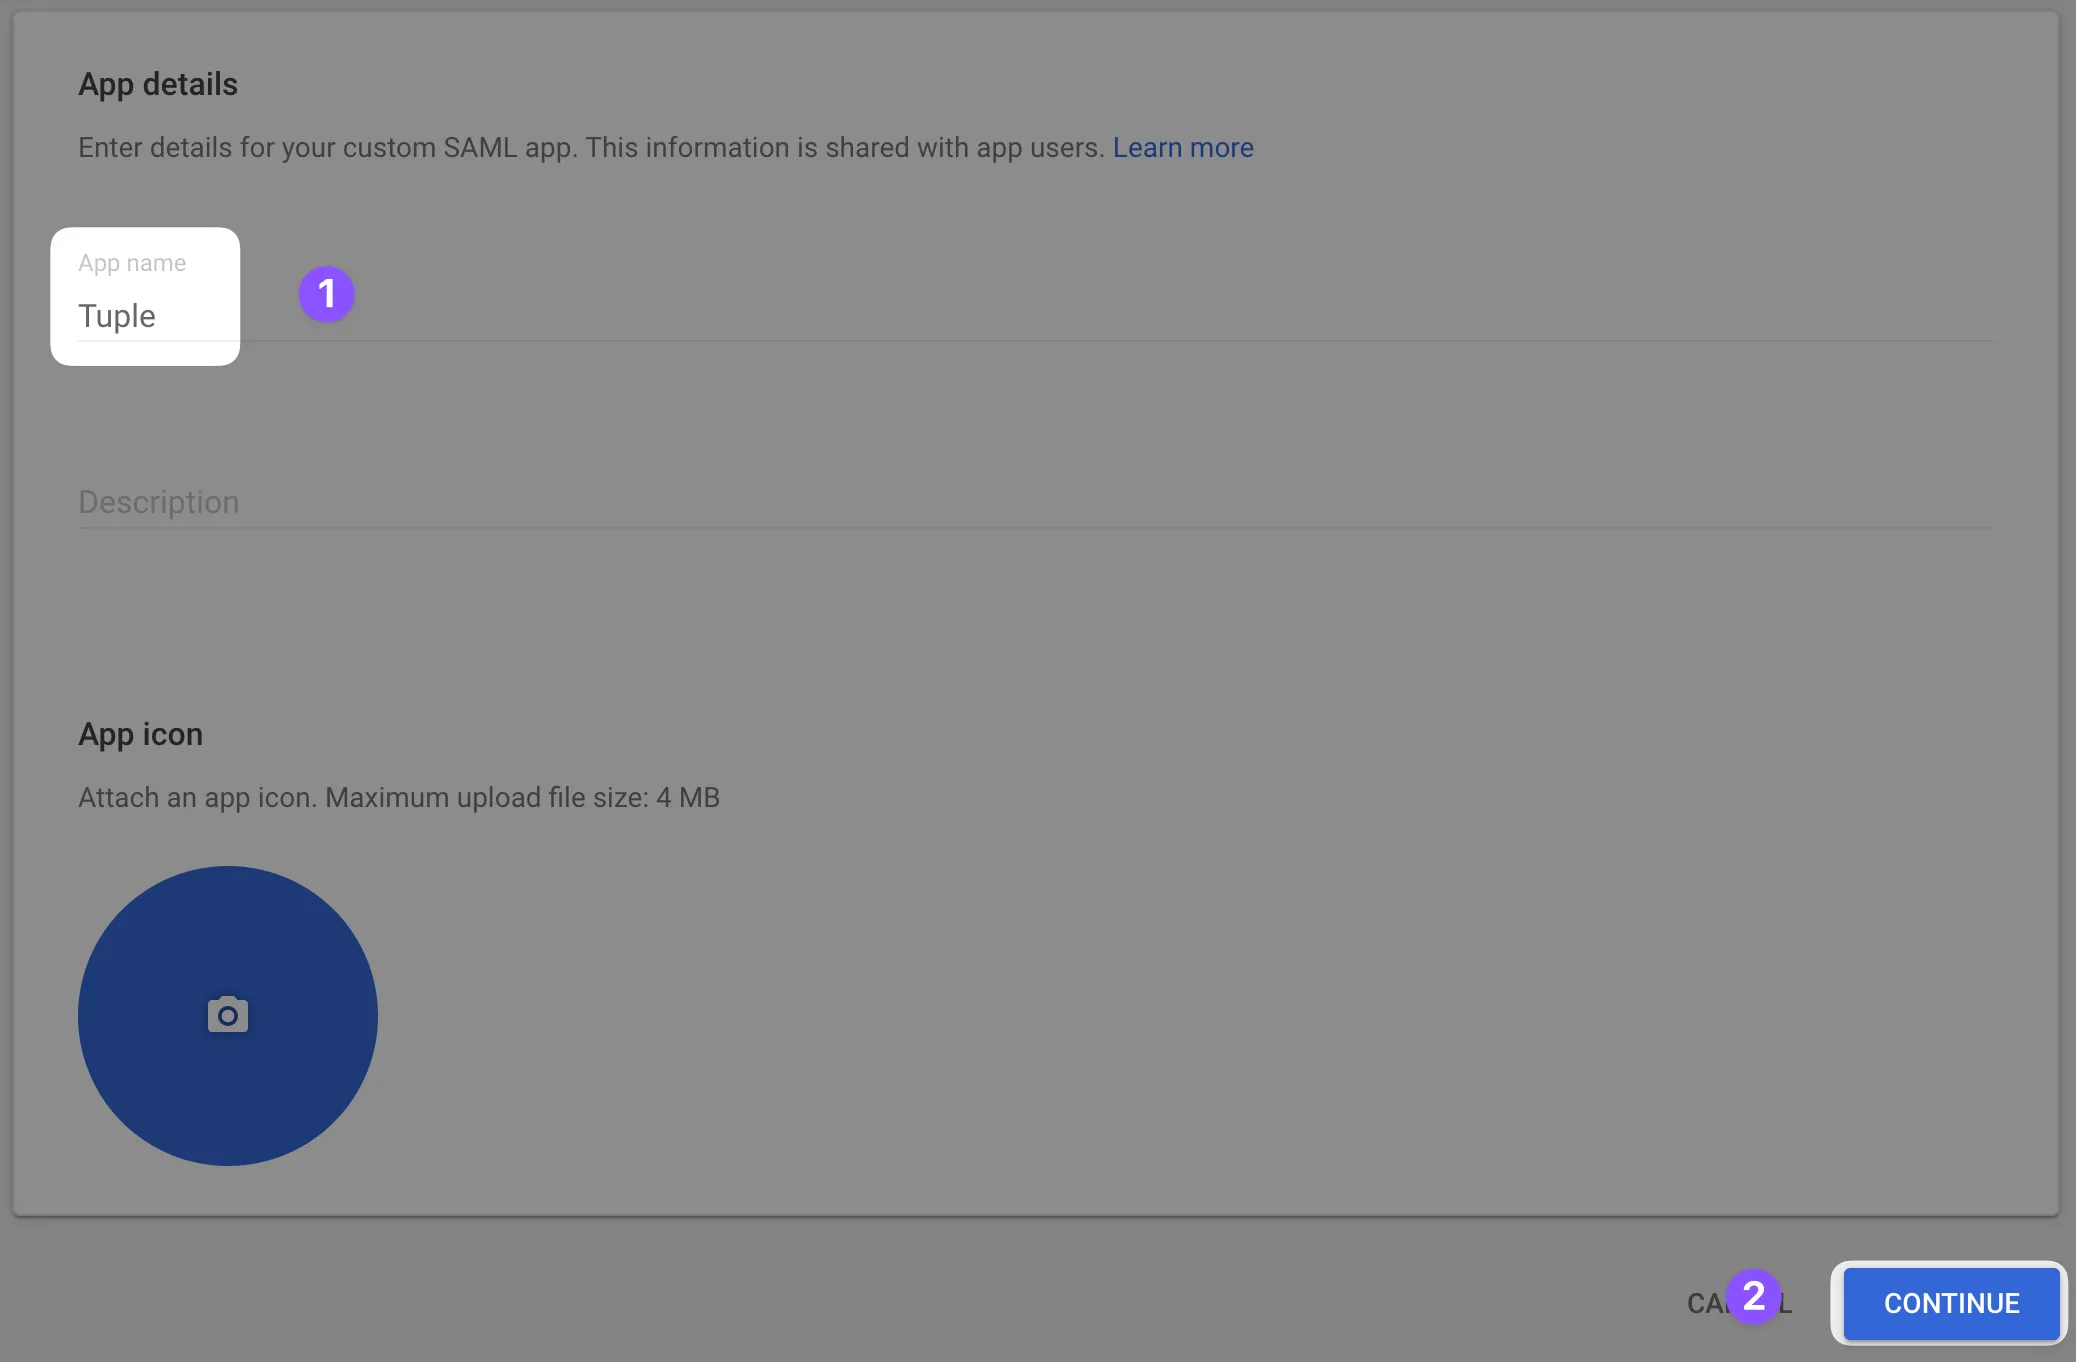
Name the app “Tuple” and optionally upload an icon, which you can download here.
Step 3 - Configure your Tuple account
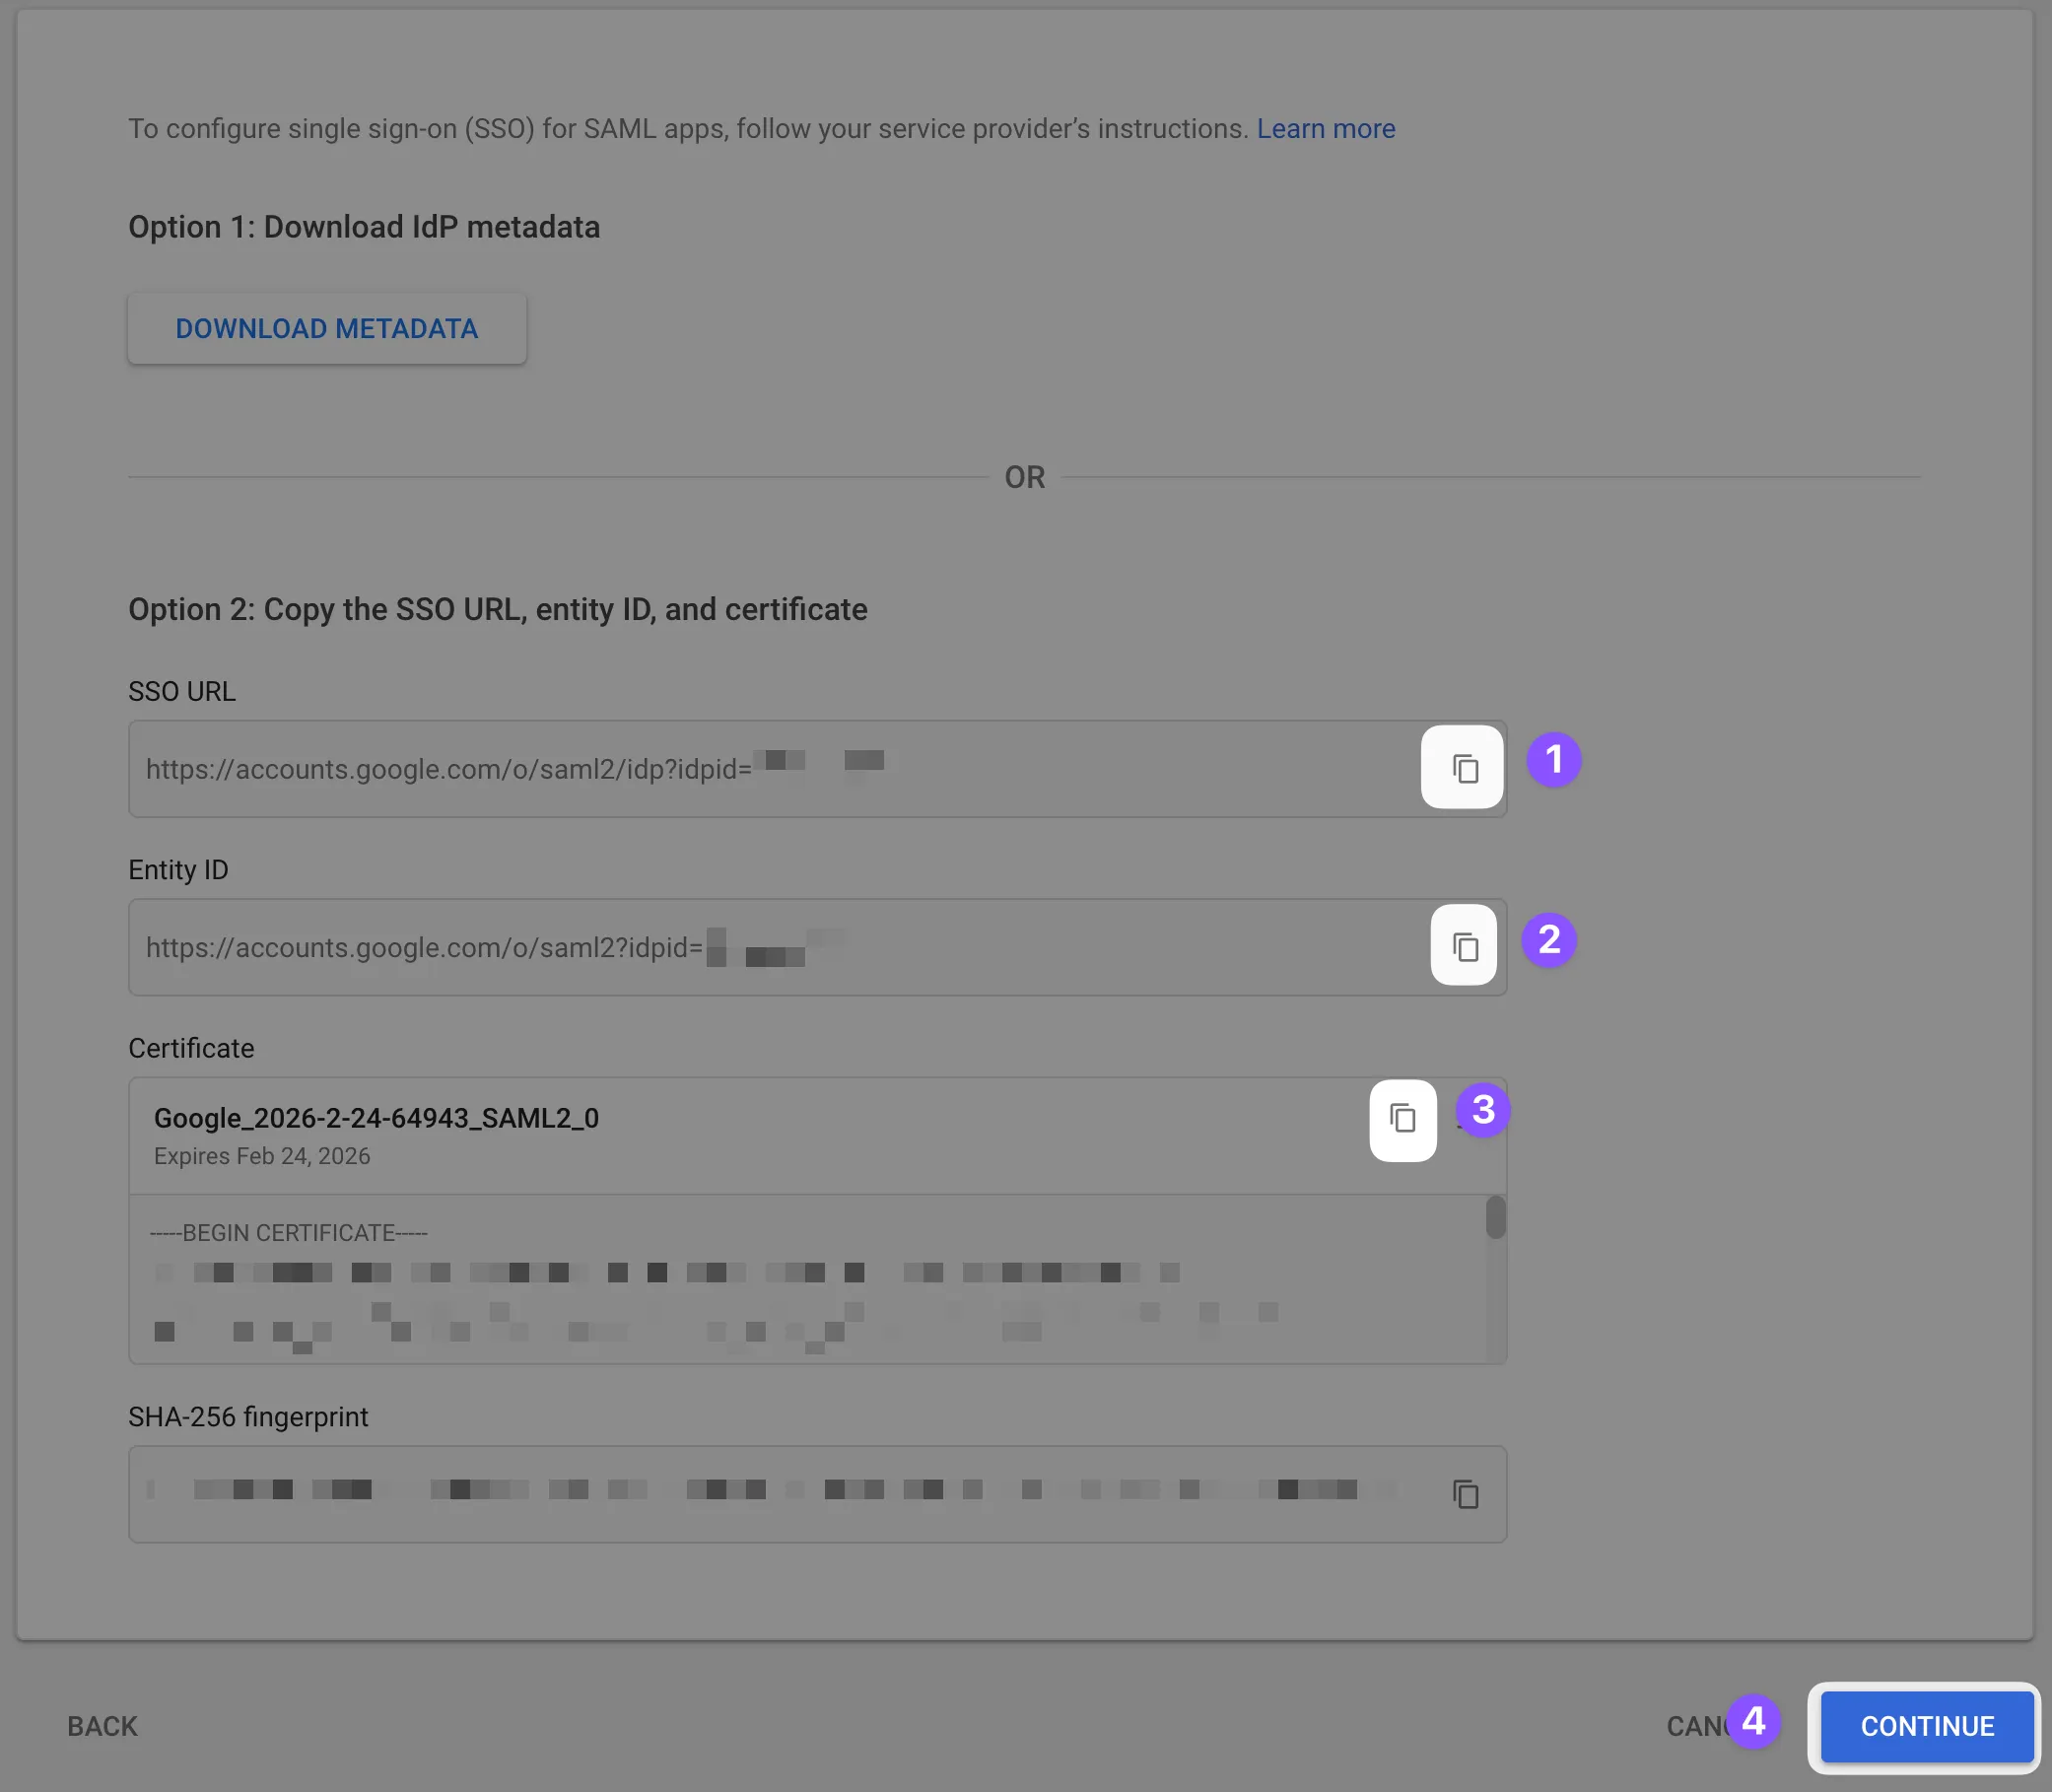
You will be shown the following screen, and will need to copy the values for the following fields:
Navigate to the Settings tab of the team management dashboard. Note: Only Team Owners have access to this page, so you will need to be Team Owner to access this page. If you need to find out who the Team Owner for your team is, view your profile.
Toggle to Enable SAML, and the configuration form will be revealed:
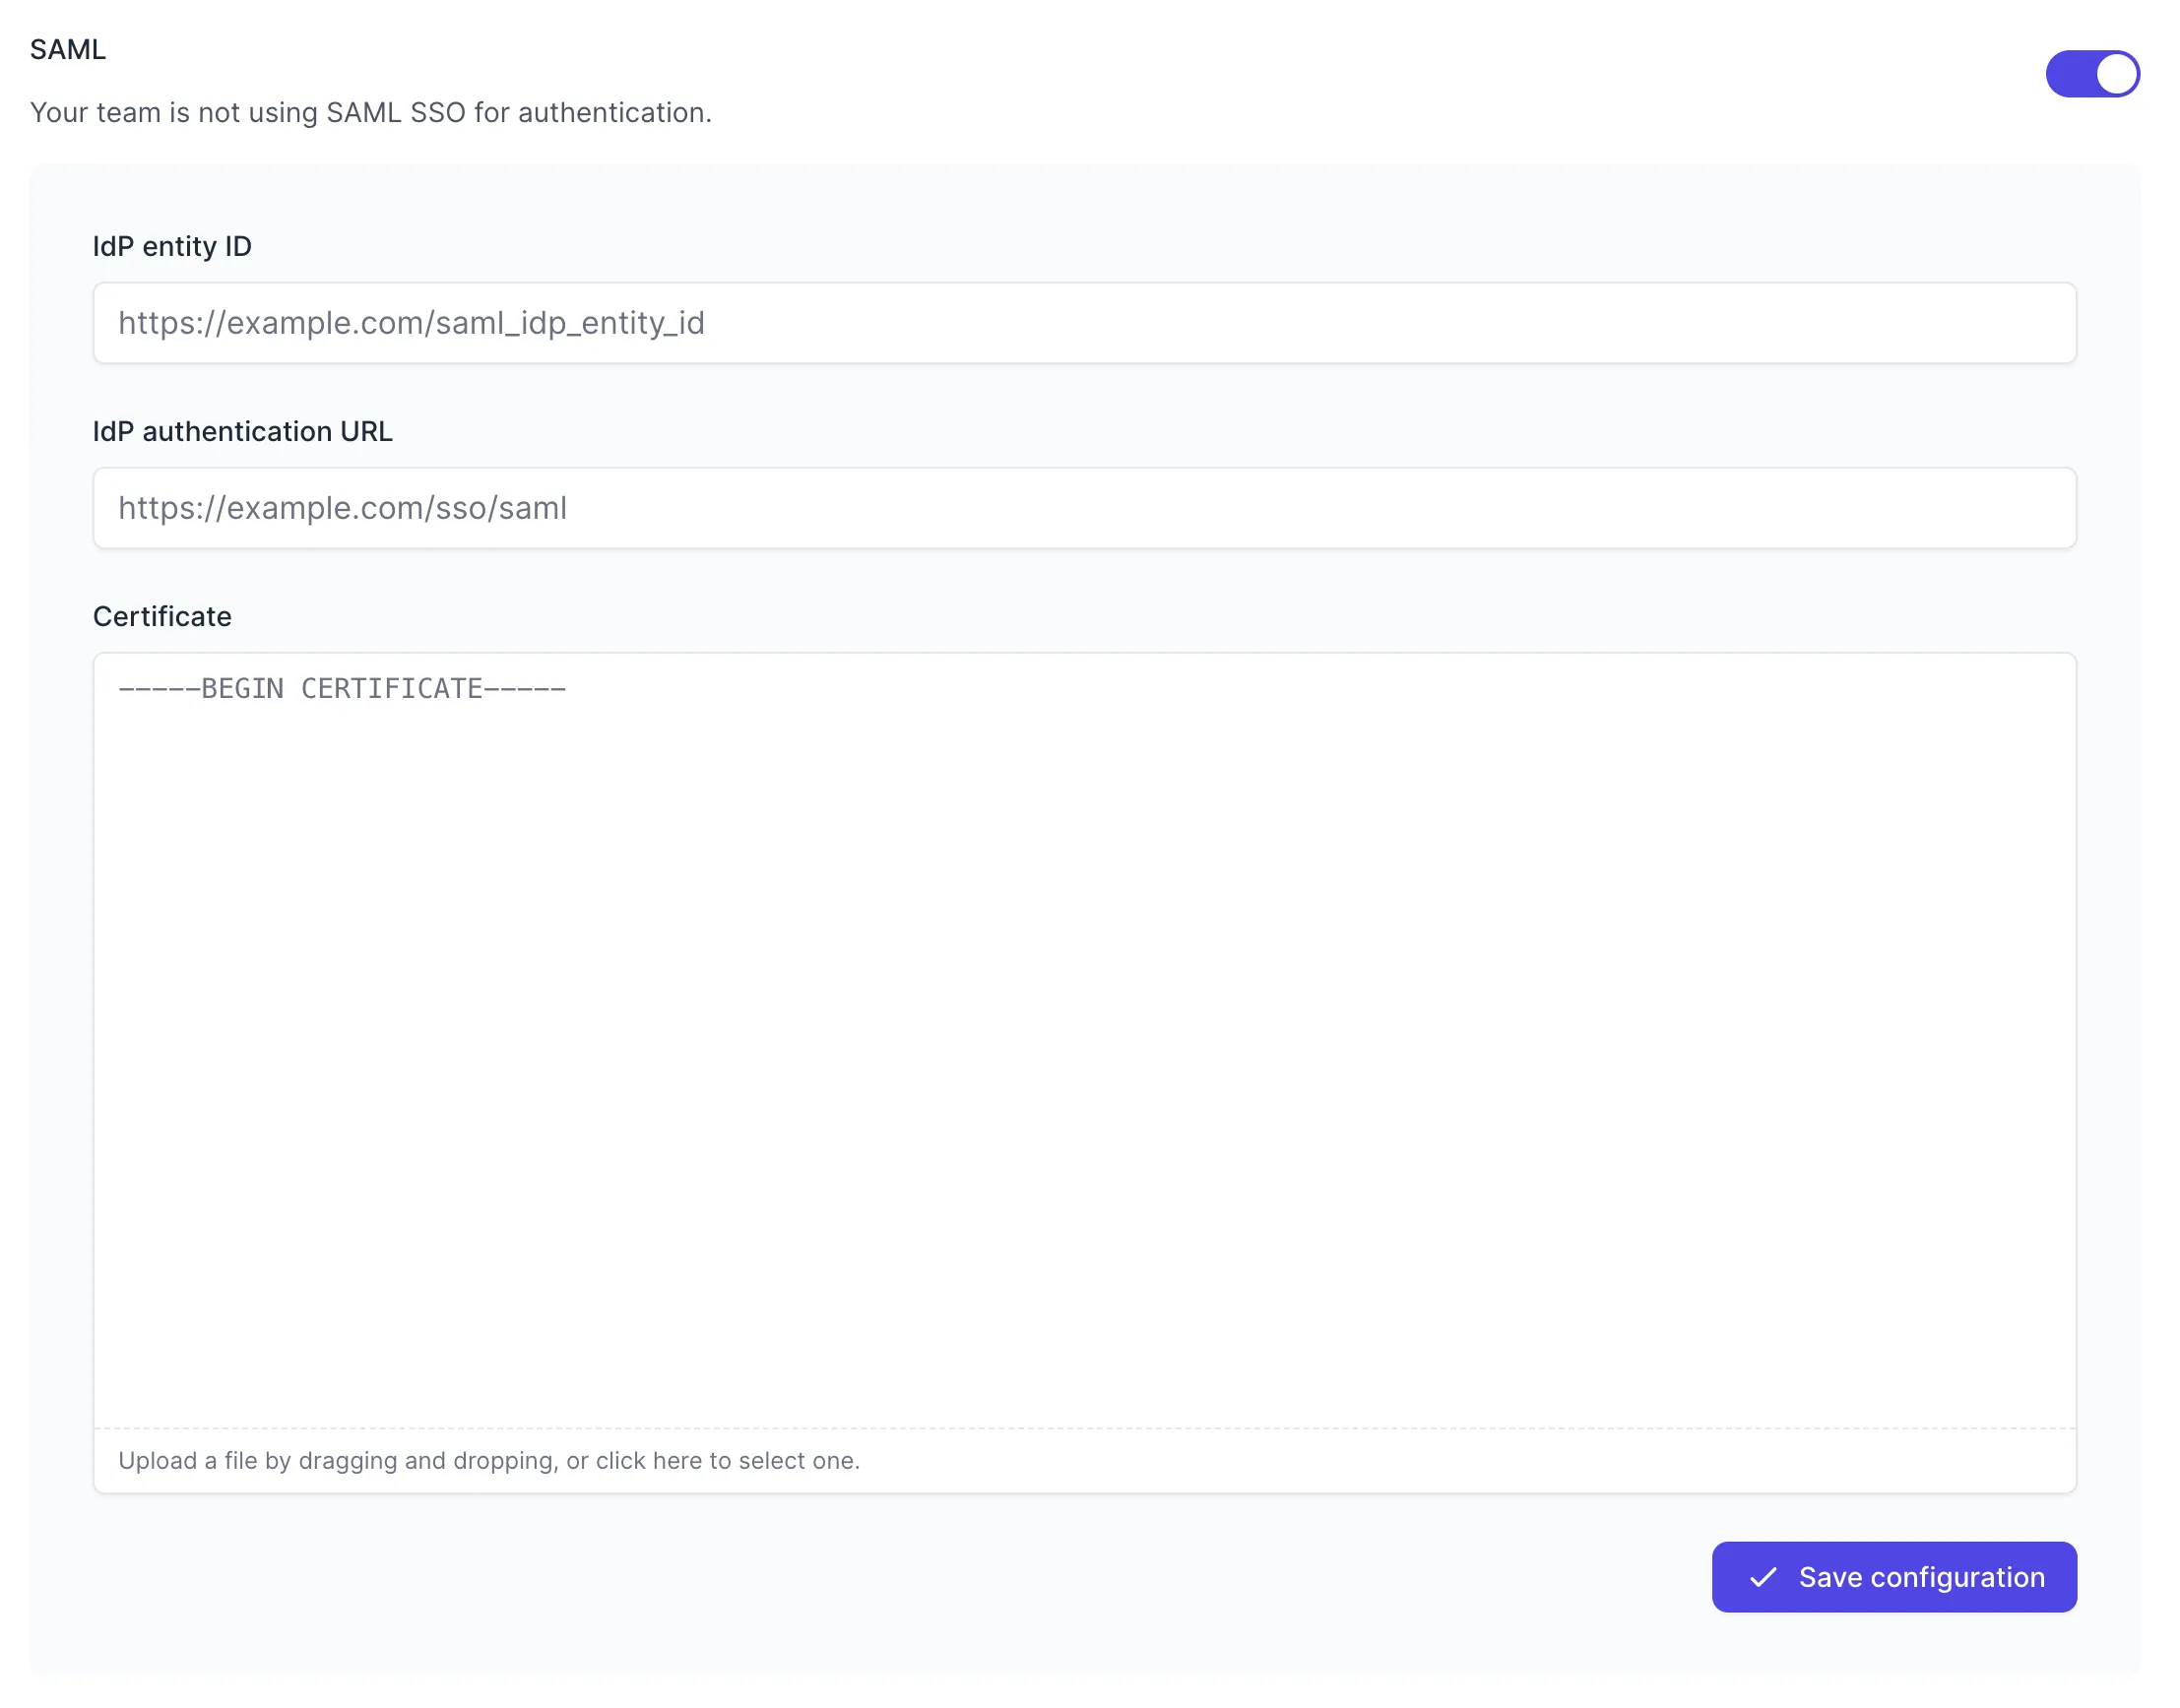
Fill in the values with your metadata (note that the order of the fields is different than the order in the Google Workspace UI):
- IdP entity ID - called “Entity ID” in Google Workspace (ends with an ID string)
- IdP authentication URL - your “SSO URL” in Google Workspace (ends with /saml)
- Certificate - Copied certificate
Press “Save Configuration” in the Tuple dashboard.
This action will turn on SAML for your team. Once SAML is enabled, any active Tuple sessions will persist, but any new logins will be forced to authenticate using SSO.
Step 3 - Service Provider Details
Return to the Google Admin Workspace, and fill in the following fields:
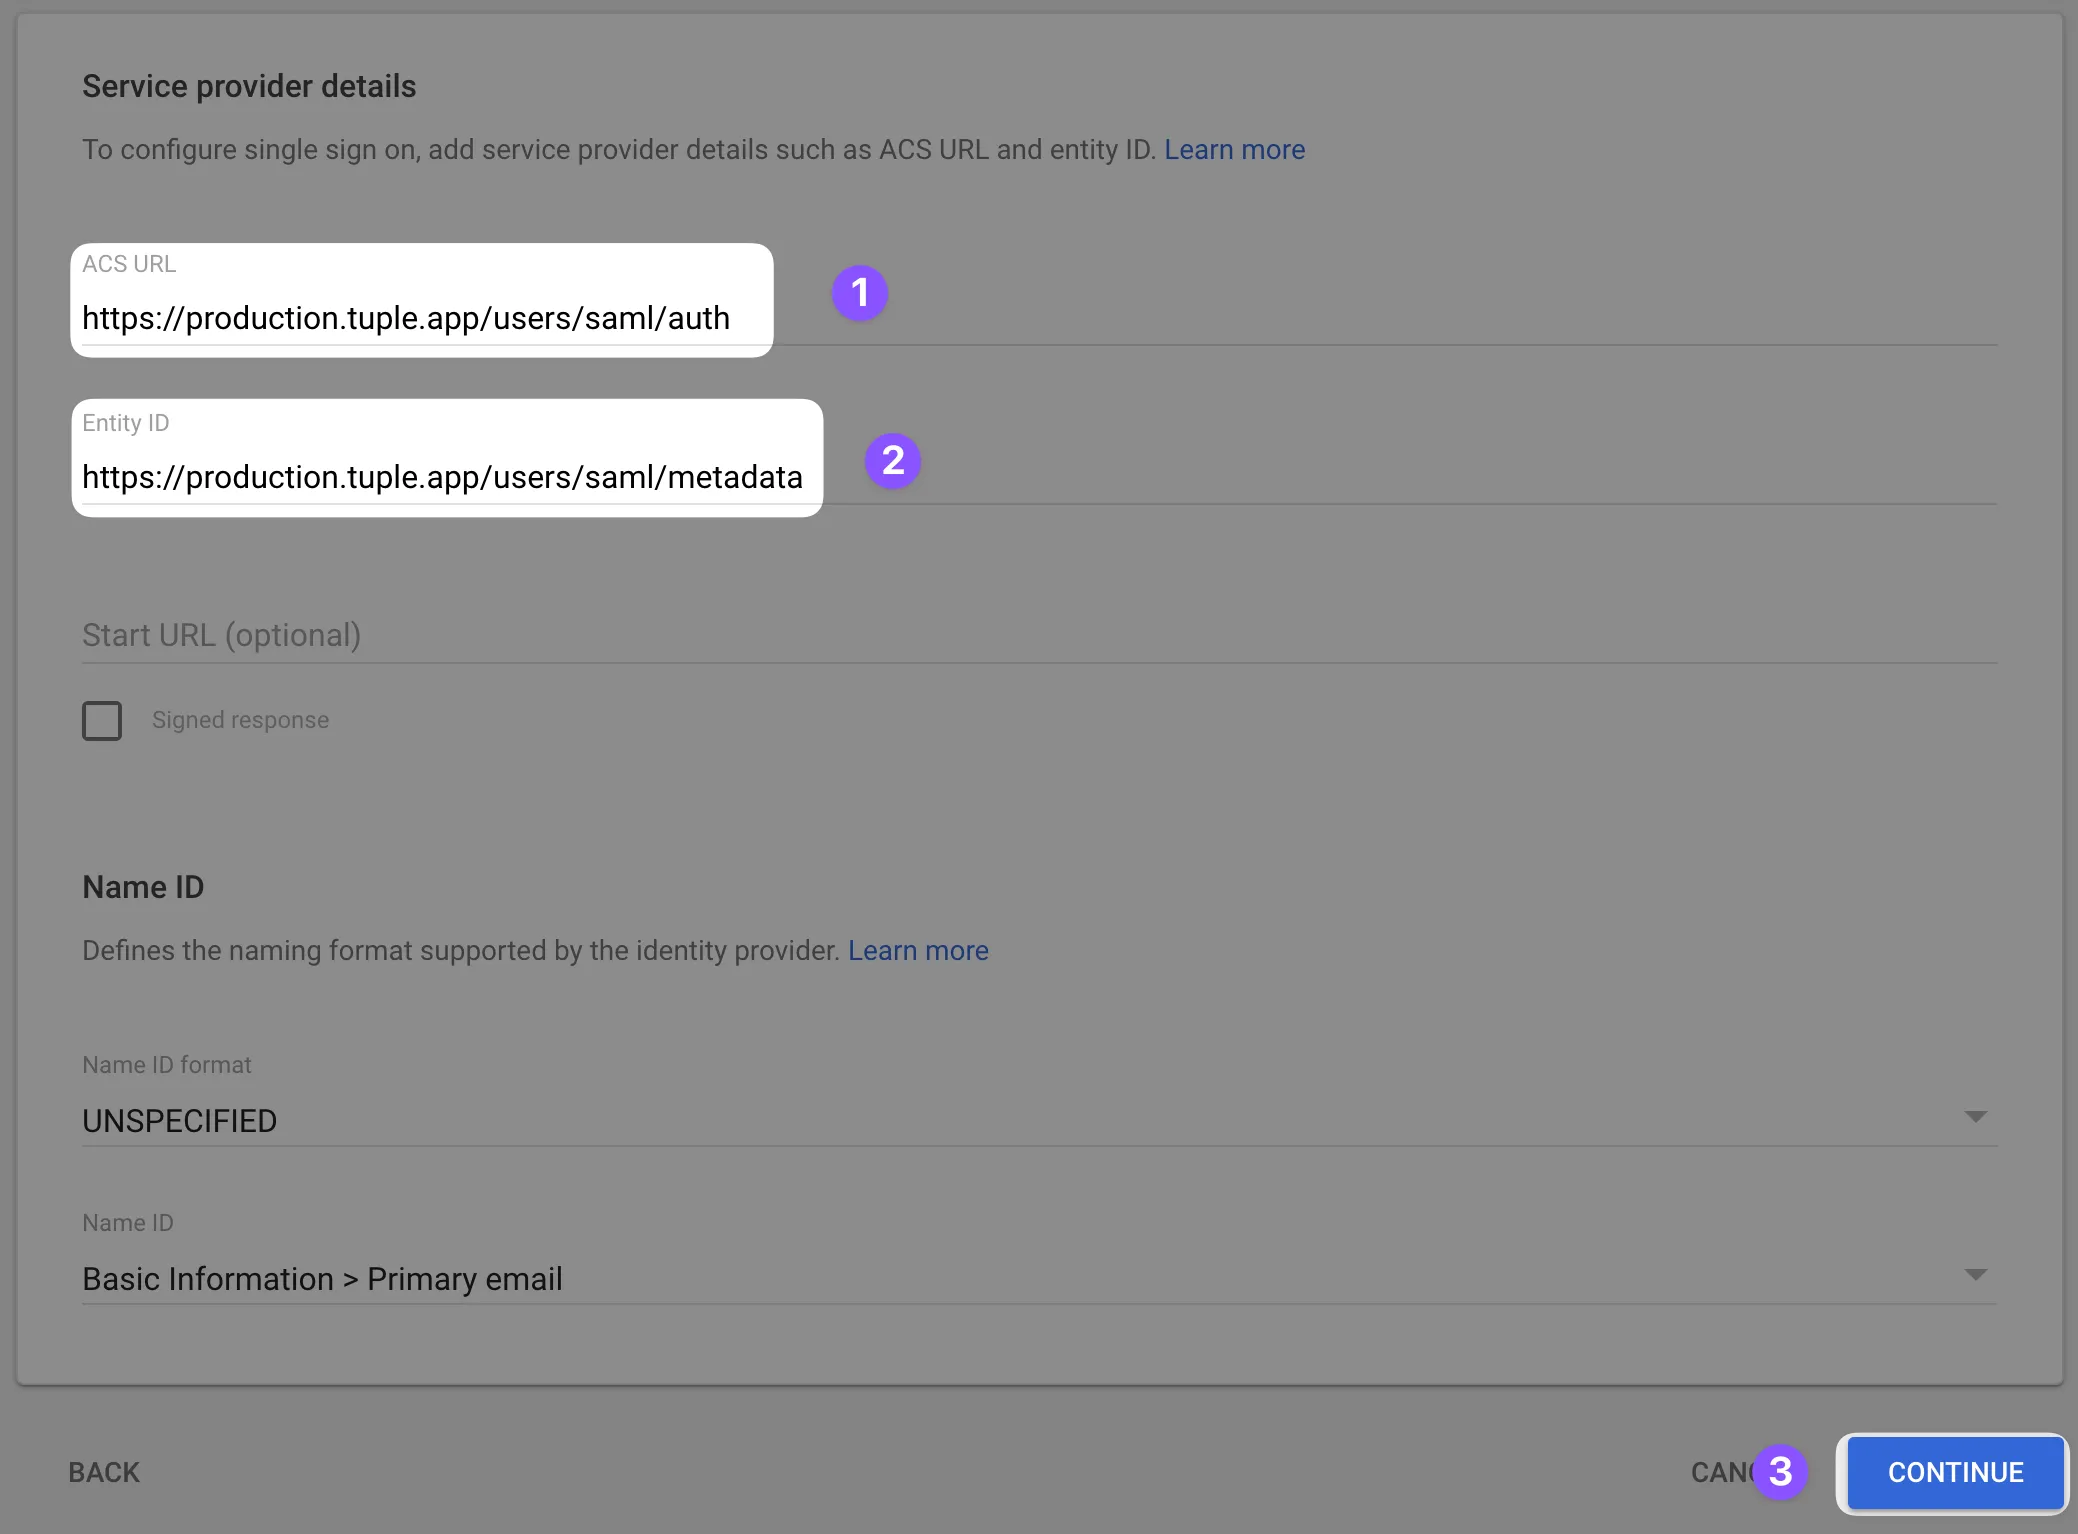
ACS URL
https://production.tuple.app/users/saml/authEntity ID
https://production.tuple.app/users/saml/metadataStep 4 - Attribute Mapping
There are two additional attributes that Tuple requires in order to work: first_name, and last_name.
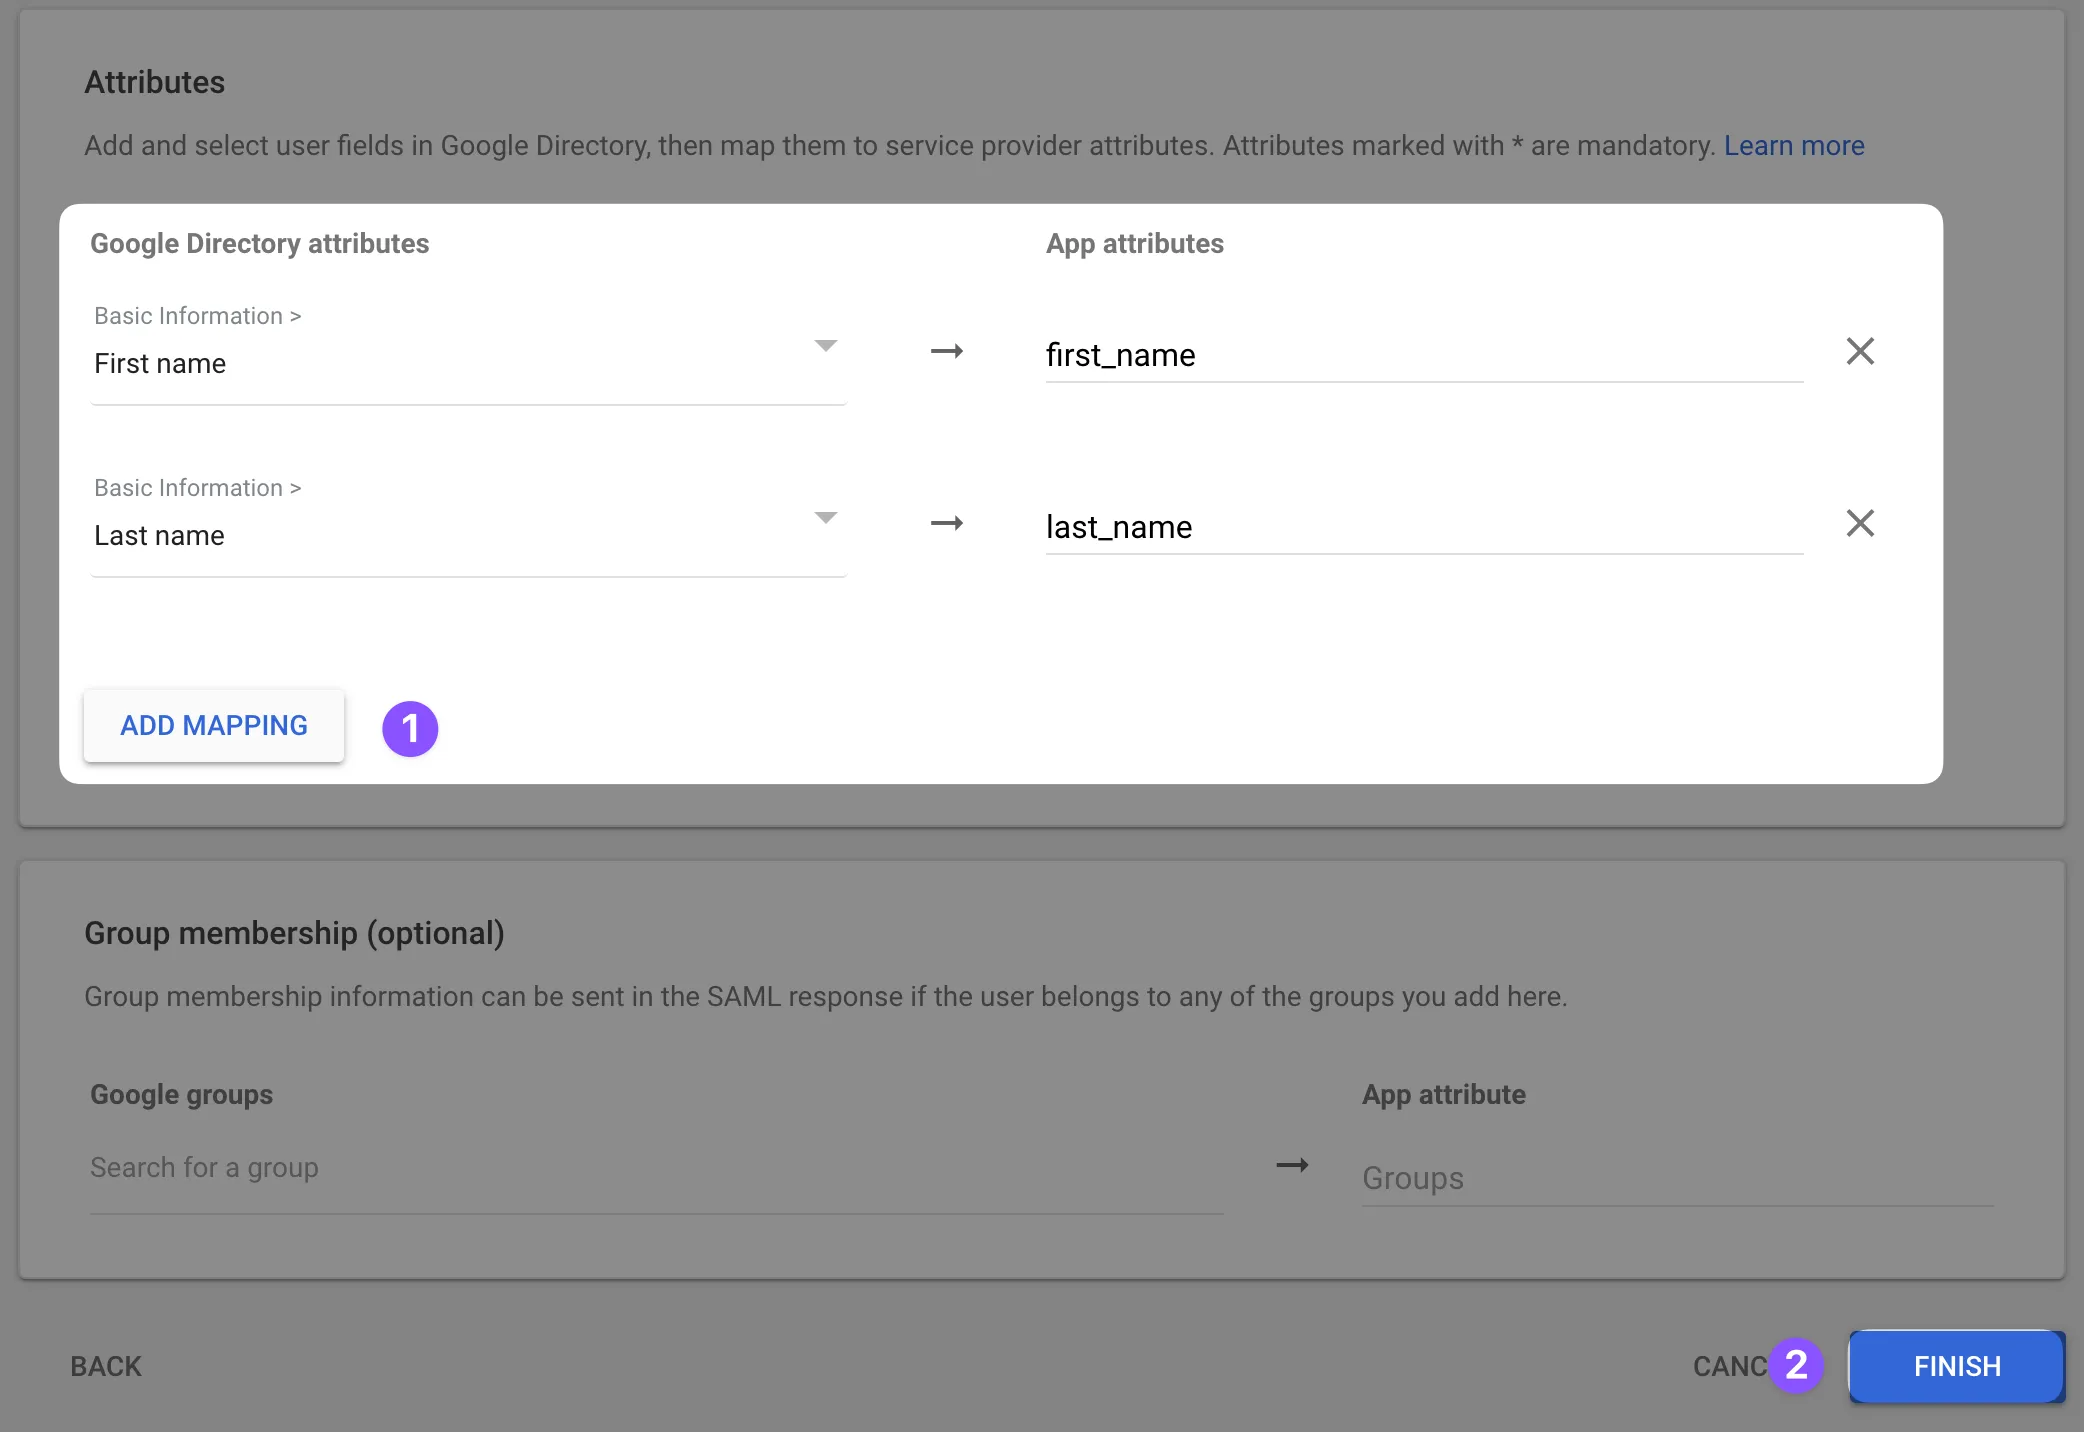
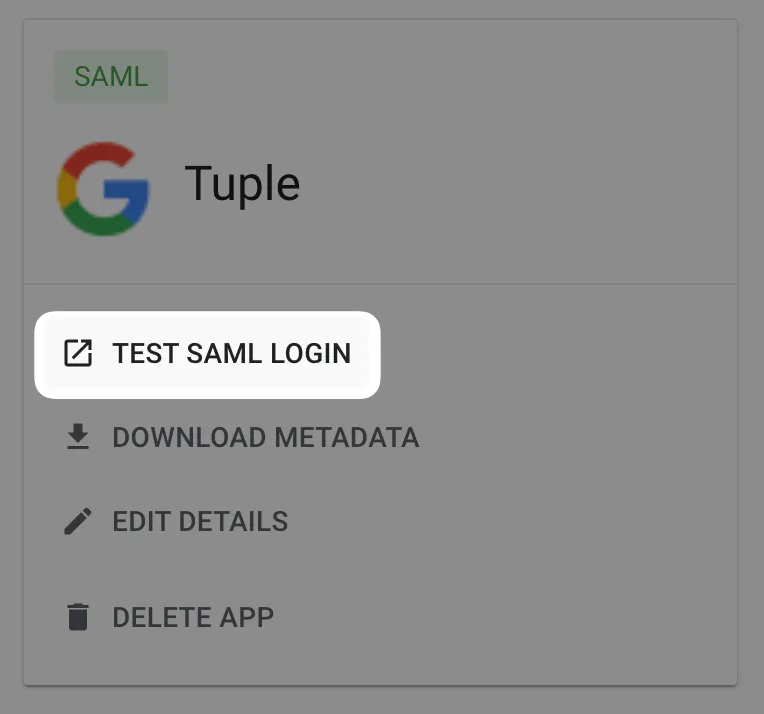
After finishing the install wizard, click Test SAML Login to verify the configuration.
