SSO Guide · Okta
A guide for Tuple customers who want to use SAML SSO with Okta as the Identity Provider.
Step 1 - Create SAML App
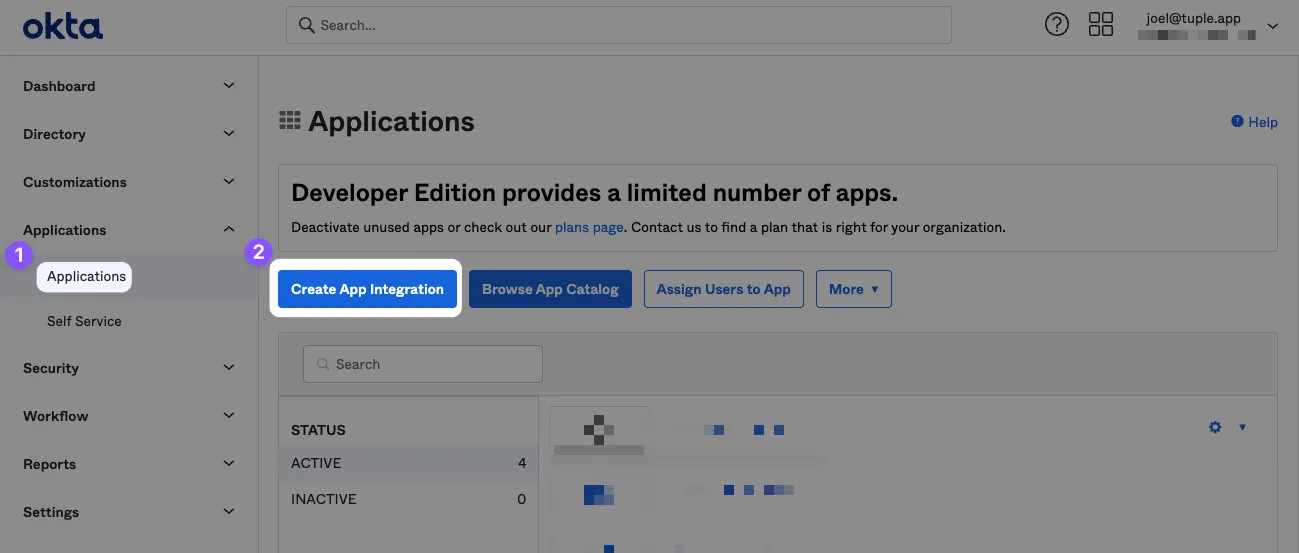
After signing in or creating your Okta account you’ll need to add a new SAML SSO application. Click on Applications in the navigation bar and then the ‘Create App Integration’ button.
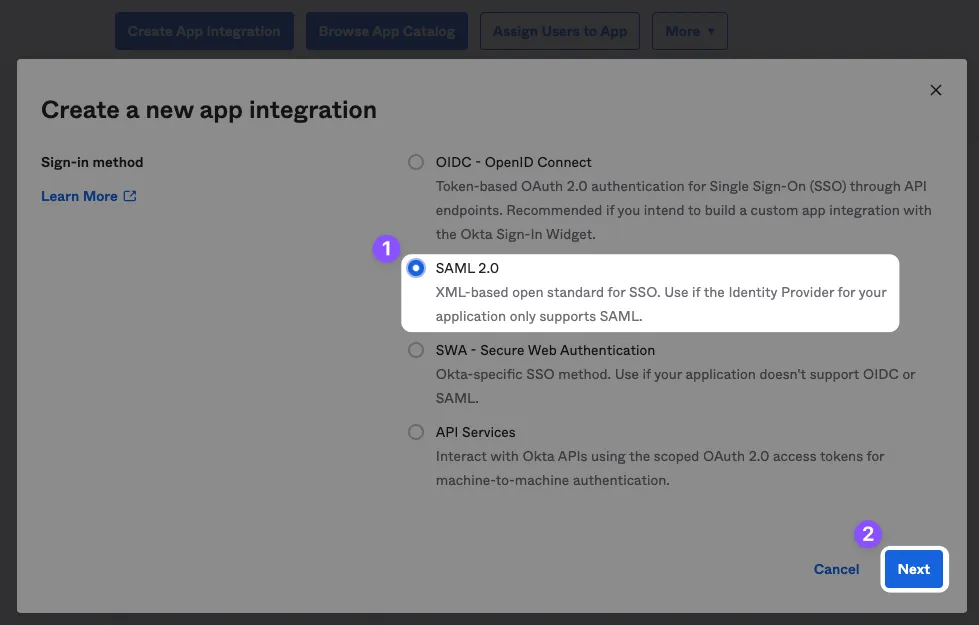
Select SAML 2.0 as the sign-in method.
Step 2 - Configure App
Name the app “Tuple” and upload an icon, which you can download here.

Fill in the following fields:

Single sign on URL
https://production.tuple.app/users/saml/authAudience URI (SP Entity ID)
https://production.tuple.app/users/saml/metadataThere are three additional attributes that Tuple requires in order to work: email, first_name, and last_name.
Step 3 - Setup SAML in Tuple using metadata
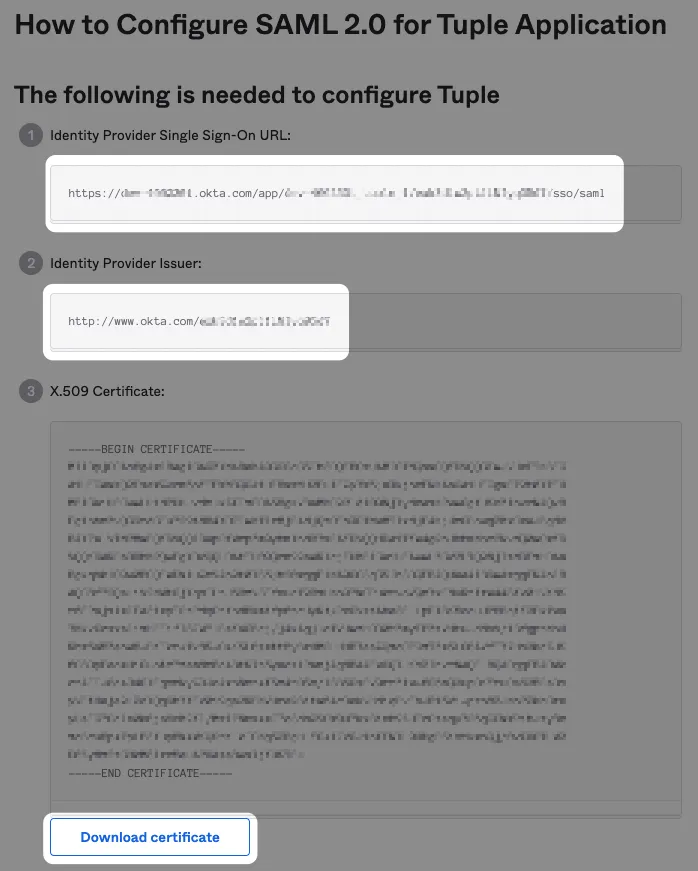
After finishing the install wizard, click View SAML Setup Instructions on the Sign On tab
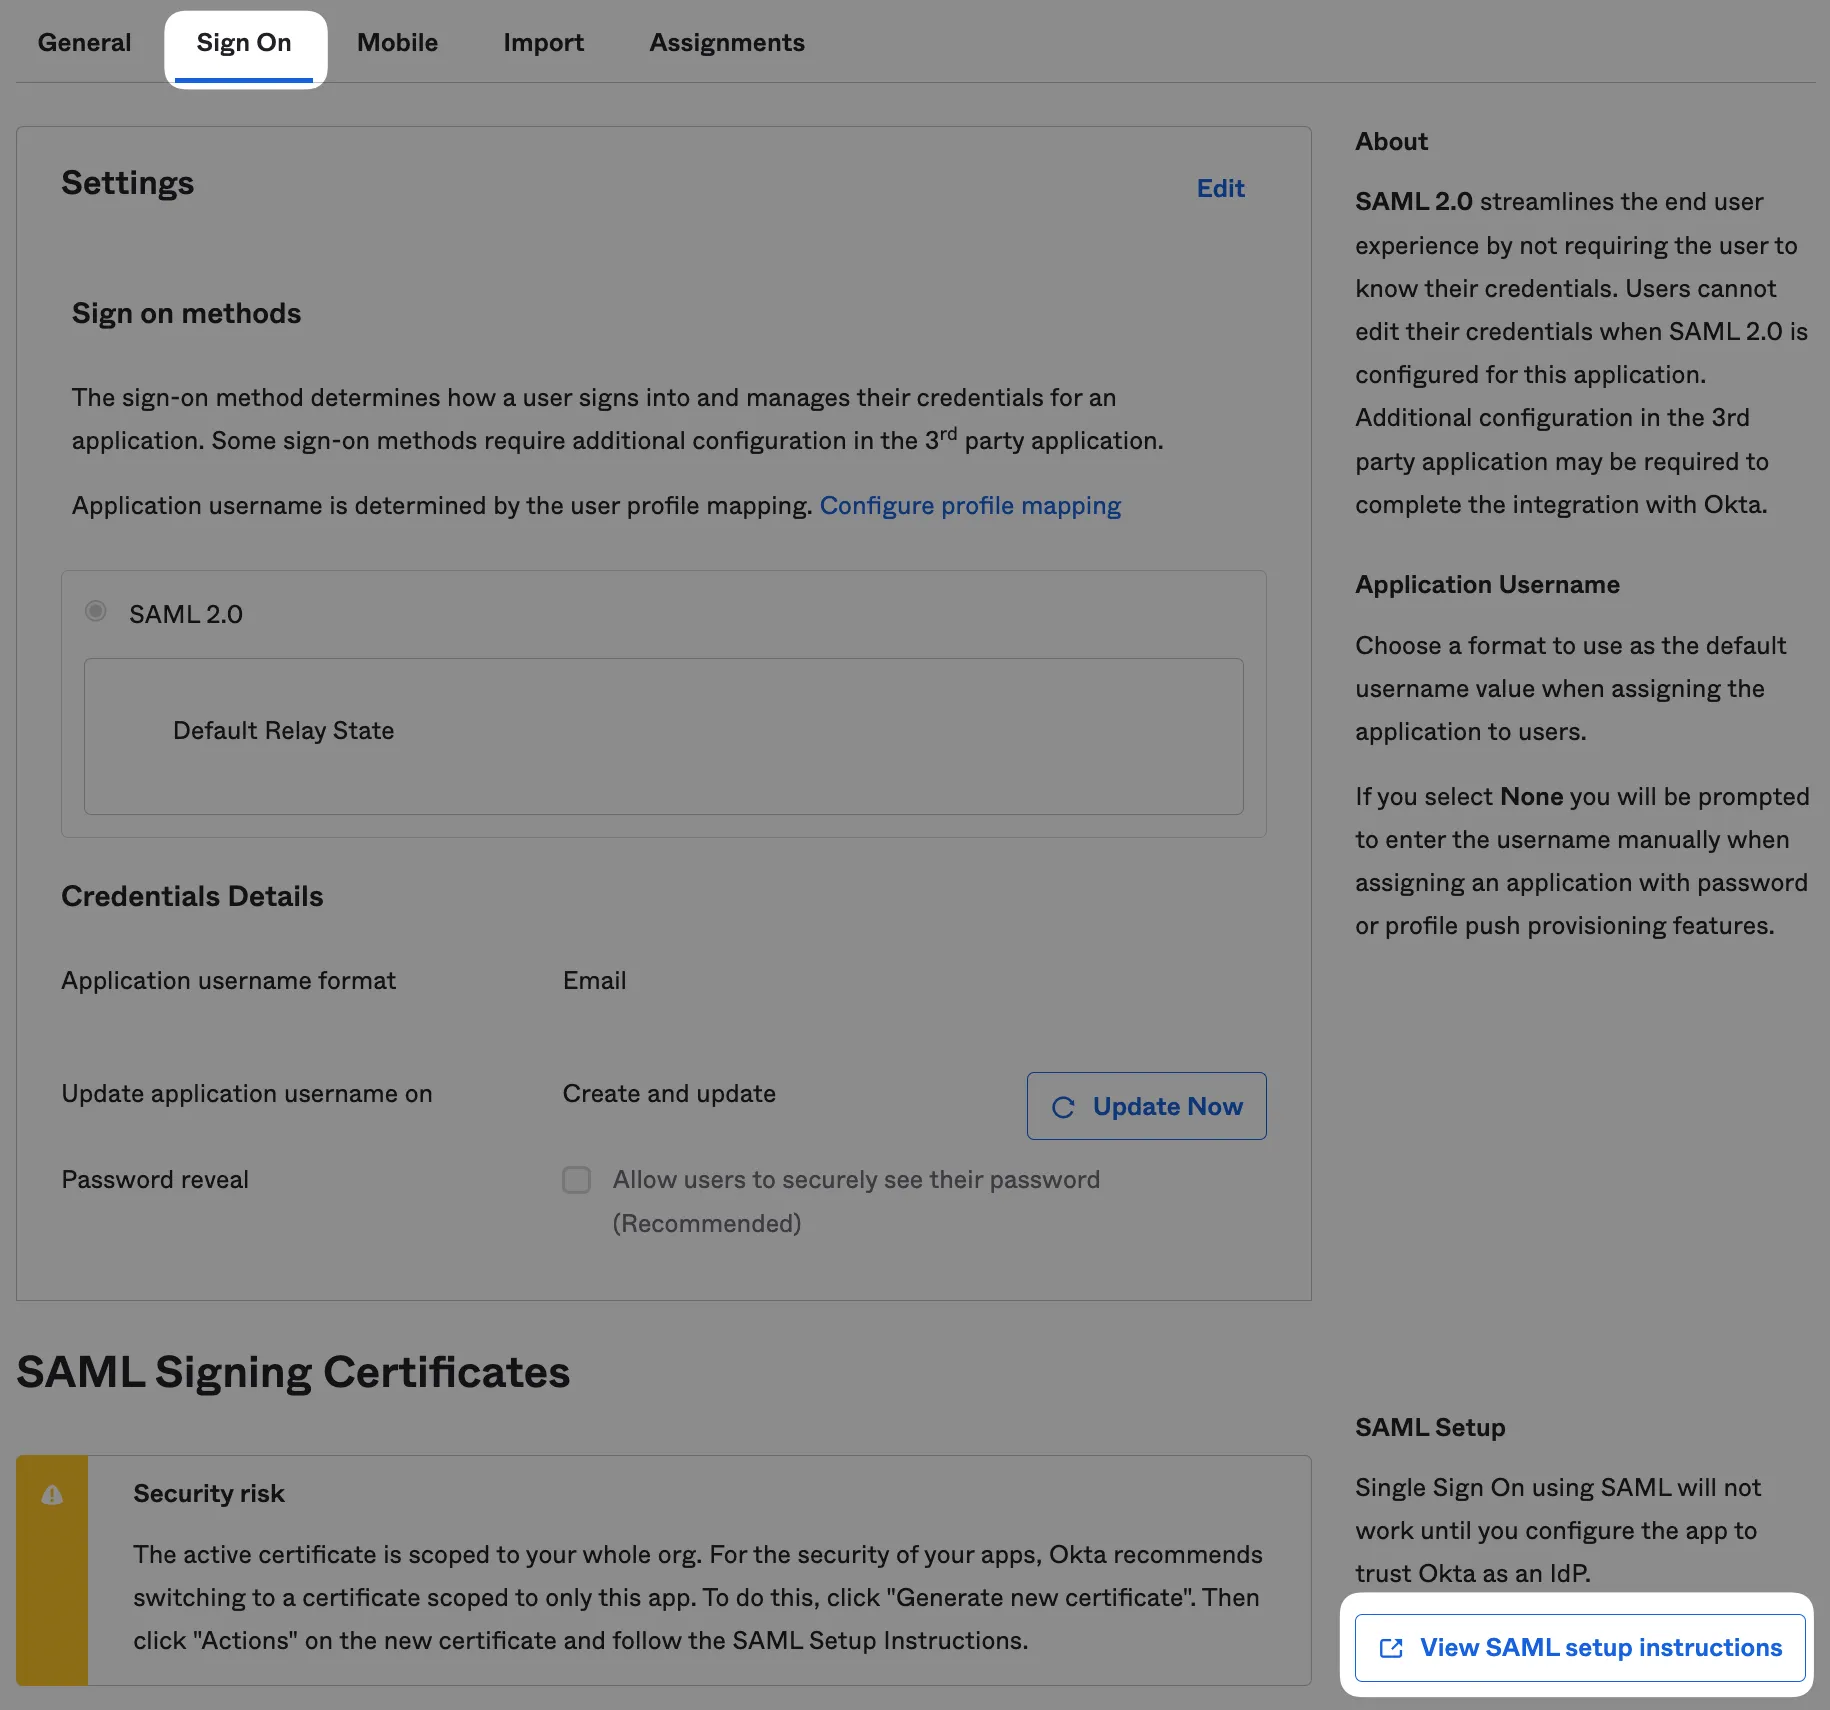
This will provide the metadata needed to configure SAML in Tuple:
- Identity Provider Single Sign-On URL
- Identity Provider Issuer URL
- Downloaded certificate file
And attach the downloaded certificate file.
Navigate to the Settings tab of the team management dashboard. Note: Only Team Owners have access to this page, so you will need to be Team Owner to access this page. If you need to find out who the Team Owner for your team is, view your profile.
Toggle to Enable SAML, and the configuration form will be revealed:

Fill in the values with your metadata:
- IdP entity ID - your Identity Provider Issuer URL (ends with an ID string)
- IdP authentication URL - your Identity Provider Single Sign-On URL (ends with /saml)
- Certificate - Downloaded certificate file
Press “Save Configuration” to turn on SAML for your team. Once SAML is enabled, any active Tuple sessions will persist, but any new logins will be forced to authenticate using Okta. Log in here to verify that it’s working.
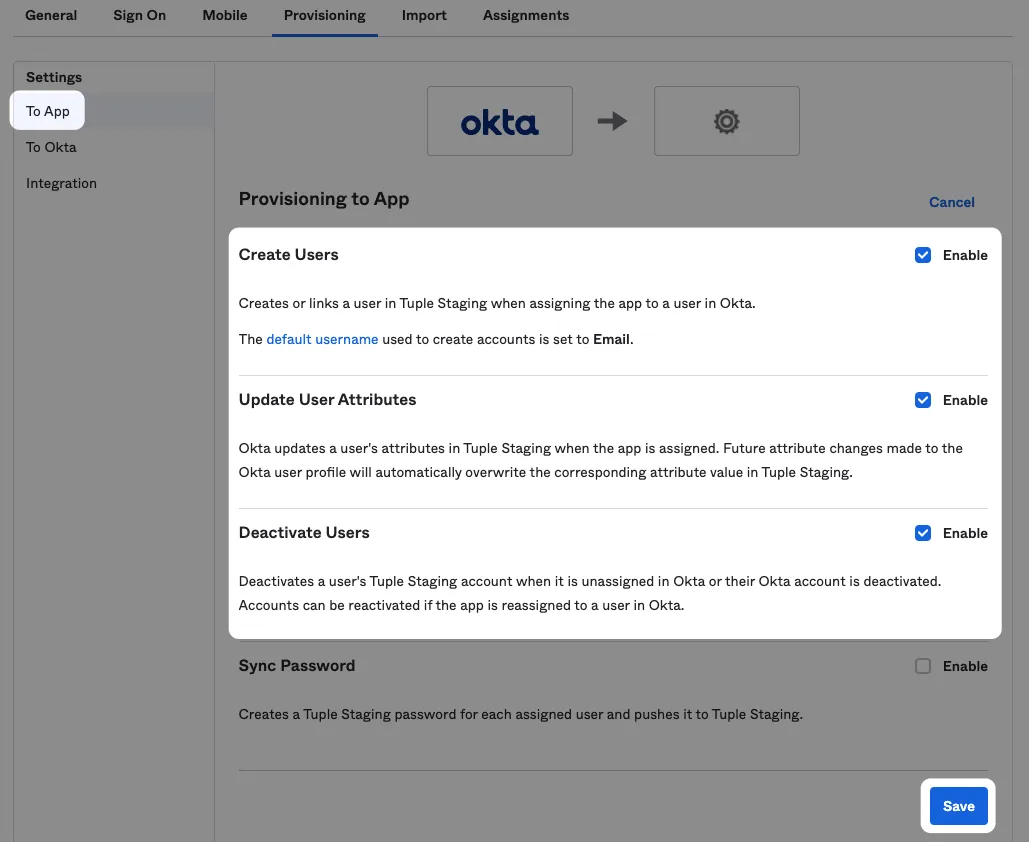
Step 4 - Enable SCIM Provisioning (optional)
Enable System for Cross-domain Identity Management (SCIM) to automatically provision/deprovision user accounts and update profiles in Tuple when updated in Okta.
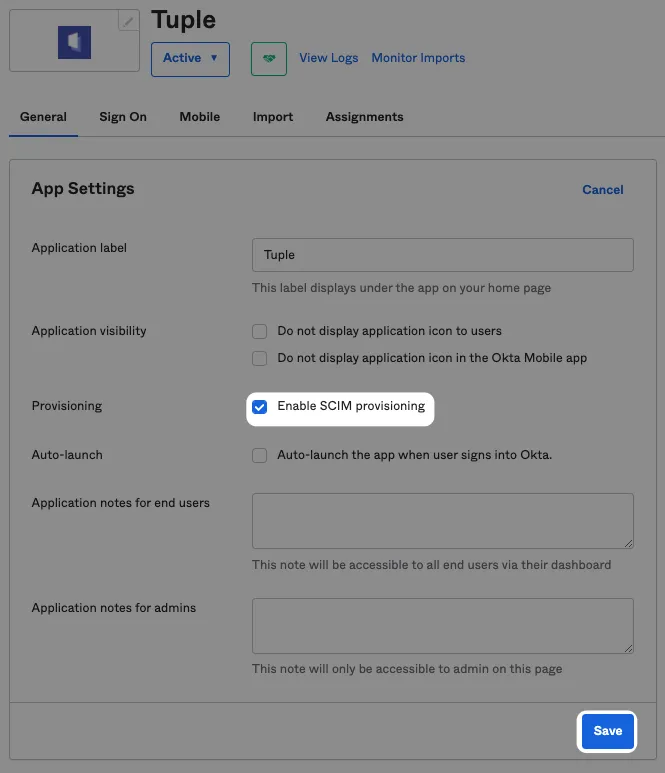
Your Okta app must be configured at creation time to use SCIM. If you have an existing app you’d like to use SCIM with, please contact Okta Support.
To use SCIM provisioning, send an email to support@tuple.app. Once approved, you will find your SCIM credentials on your Team Management page in Tuple: 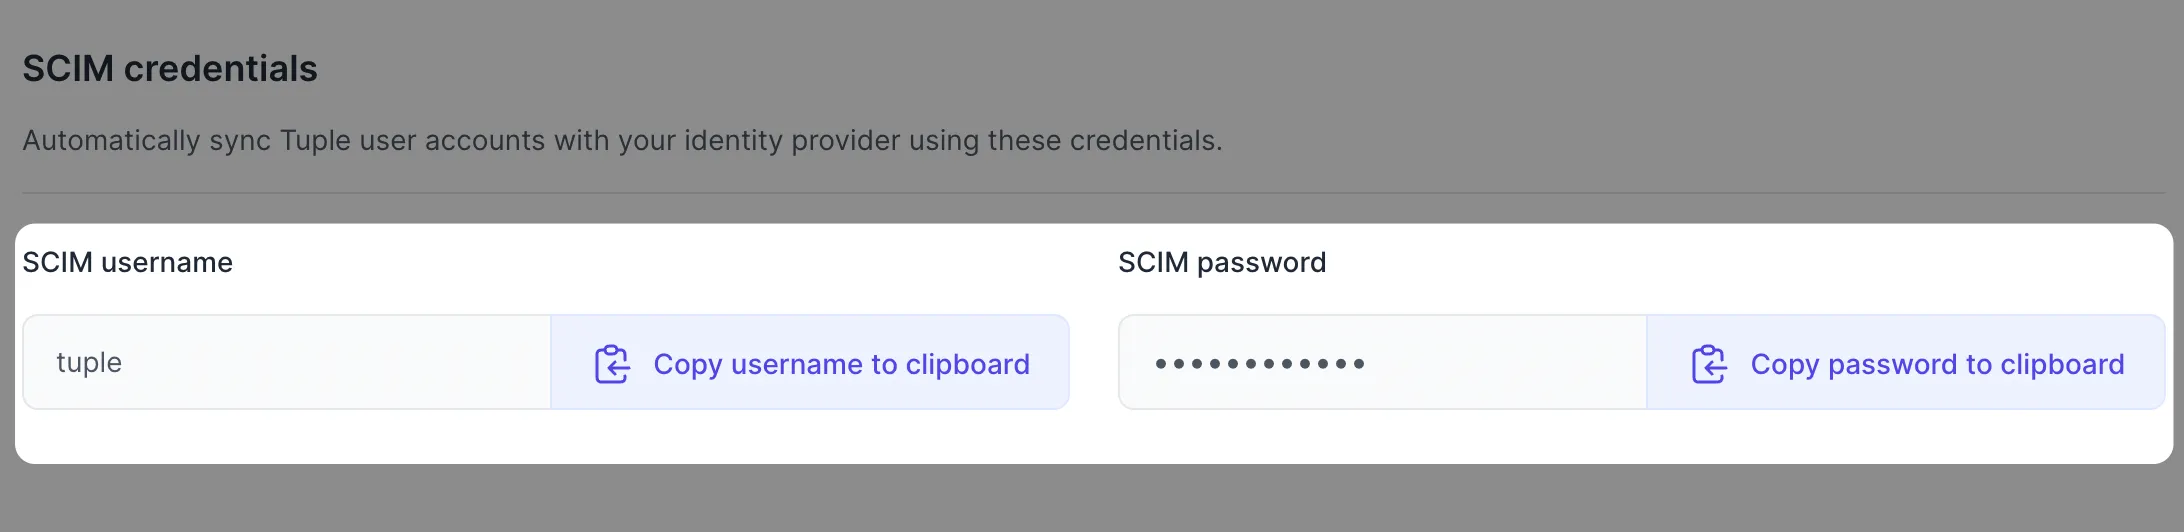
Once you have receive credentials, enable SCIM provisioning in Okta:
In “Provisioning”, configure with the following values:
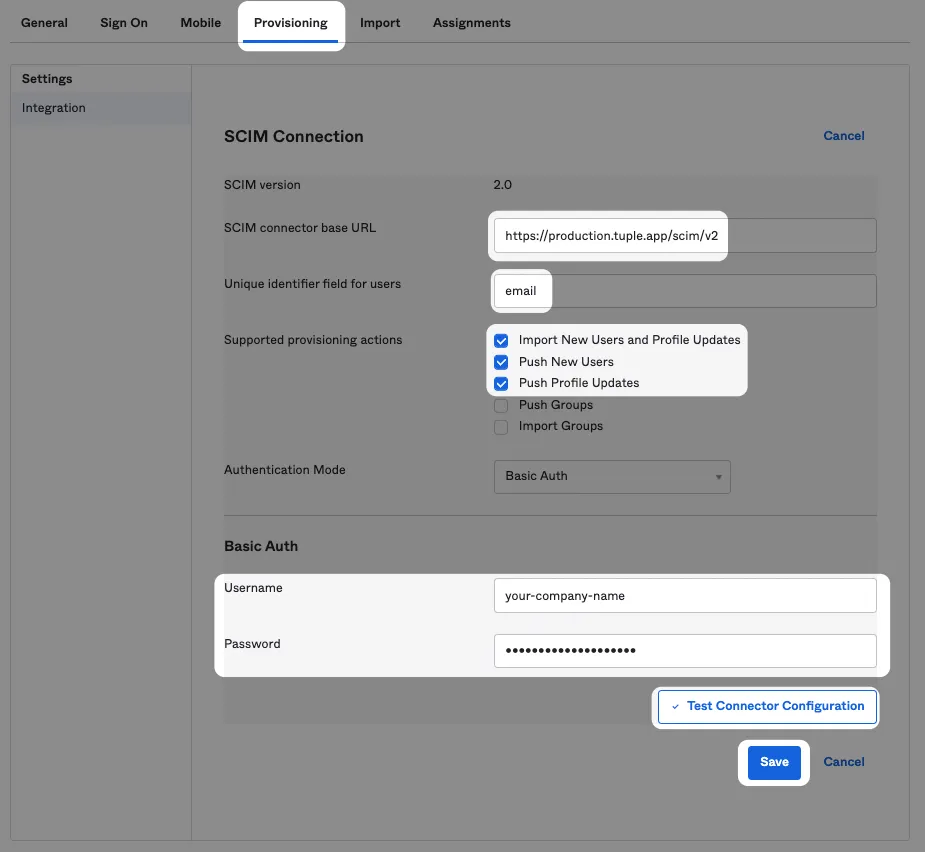
SCIM connector base URL
https://production.tuple.app/scim/v2Unique identifier field for users
emailEnable the following features:
- Import new users and Profile Updates
- Push New Users
- Push Profile Updates
Use the credentials you received earlier via your Team Management page.
Once the integration step is successful enable features “To App”: